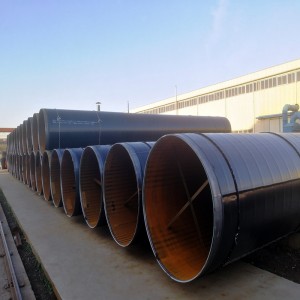
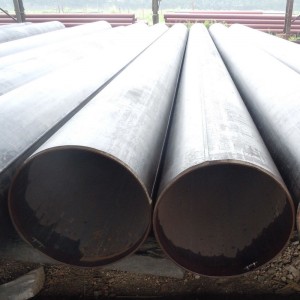
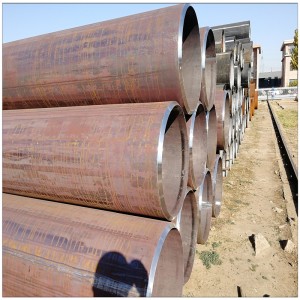
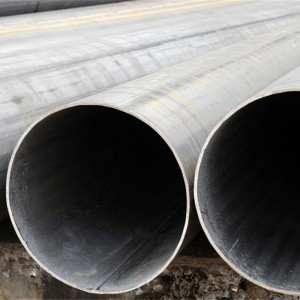
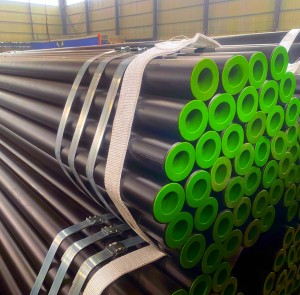
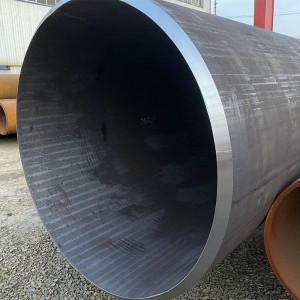
API 5L X65 PSL1/PSL2 LSAW Carbon Steel Pipe is a kind of carbon steel pipe which is made by steel plate,having straight seam on its surface.The outside diameter of it is very large,up to1500 millimeter. Precise manufacturing process malkes it a superior tool of transportation of oil and gas,which has attacted a large number of customers all around the world.
As an excellent LSAW supplier,we have a manufactory with responsible workers.One of our company’s advantages is that we have a fast delivery time and we will have a serious testing of every products before delivering them.Besides,we are always remembering to do our best to meet our customers’needs such as bare、black paiting、Varnishing、3PE anti-corrosion、Galvanized pipe cap and so on.
To create much more benefit for shoppers is our enterprise philosophy; client growing is our working chase for China Steel Line and Pipe Mill, Most problems between suppliers and clients are due to poor communication. Culturally, suppliers can be reluctant to question points they do not understand. We break down those barriers to ensure you get what you want to the level you expect, when you want it. Faster delivery time and the product you want is our Criterion .
API 5L X65 PSL1/PSL2 LSAW Carbon Steel Pipe is usually used in projects of oil and gas pipeline , in submarine pipeline, pipelines through high-altitude zones and dense urban areas.
API 5L X65 PSL1/PSL2 LSAW Carbon Steel Pipe is manufactured by forming the X65 steel plates into a round shape then welding the seam through automatically arc welding process. In the production of API 5L X65
PSL1&PSL2 LSAW Carbon Steel Pipe, plates of grade X65 are formed by the molding machine into round shape then welded through double-sided submerged arc welding.
Manufacture:Longitudinally Submerged Arc Welding
Size: O.D.: 406~1422mm W.T.: 8~60mm
Length: 3-12M or specified length as required.
Ends: Plain End, Beveled End, Grooved
Grade and Chemical Composition (%) For API 5L X65 PSL1 / API 5L X70 PSL1
|
Standard |
Grade |
Chemical composition(%) |
|||
|
C |
Mn |
P |
S |
||
|
API 5L |
X65 |
≤0.26 |
≤1.45 |
≤0.030 |
≤0.030 |
|
API 5L |
X70 |
≤0.26 |
≤1.65 |
≤0.030 |
≤0.030 |
Grade and Chemical Composition (%) For API 5L X65 PSL2 / API 5L X70 PSL2
|
Standard |
Grade |
Chemical composition(%) |
|||
|
C |
Mn |
P |
S |
||
| API 5L |
X65 |
≤0.22 |
≤1.45 |
≤0.025 |
≤0.015 |
| API 5L |
X70 |
≤0.22 |
≤1.65 |
≤0.025 |
≤0.015 |
Mechanical Properties of API 5L GR.B X65 (PSL1) / API 5L X70 (PSL1):
|
Grade |
Yield Strength(MPa) |
Tensile Strength(MPa) |
Elongation A% |
||
|
|
psi |
MPa |
psi |
MPa |
Elongation (Min ) |
|
X65 |
65,000 |
448 |
77,000 |
531 |
18 |
|
X70 |
70,000 |
483 |
82,000 |
565 |
18 |
Mechanical Properties of API 5L X65 PSL1/PSL 2 (PSL2) / API 5L Grade X70 (PSL 2):
|
Grade |
Yield Strength(MPa) |
Tensile Strength(MPa) |
Elongation A% |
Impact (J) |
||
|
|
psi |
MPa |
psi |
MPa |
Elongation (Min ) |
Min |
|
X65 |
65,000 |
448 |
87,000 |
600 |
18 |
40 |
|
X70 |
70,000 |
483 |
90,000 |
621 |
18 |
40 |
|
Size |
Tolerance (with respect to specified outside diameter) |
|
<2 3/8 |
+ 0.016 in., – 0.031 in. (+ 0.41 mm, – 0.79 mm) |
|
> 2 3/8 and ≤4 1/2, continuous welded |
±1.00% |
|
> 2 3/8 and < 20 |
±0.75% |
|
> 20. seamless |
± 1.00% |
|
>20 and <36, welded |
+ 0.75%.-0.25% |
|
> 36, welded |
+ 1/4 in.. – 1/8 in. (+ 6.35 mm, -3.20 mm) |
In the case of pipe hydro-statically tested to pressures in excess of standard test pressures, other tolerances may be agreed upon between the manufacturer and the purchaser.
|
Size |
Minus Tolerance |
Plus Tolerance |
End-to-End Tolerance |
Out-of-Roundness |
|
|
Diameter,Axis Tolerance (Percent of Specified OD) |
Maximum Differential Between Minimum and Maximum Diameters (Applies Only to Pipe With D/t≤
75) |
||||
|
≤10 3/4 l&V4 |
1/64(0.40mm) |
1/16(1.59mm) mm) |
— |
— |
|
|
>10 3/4 and ≤20 |
1/32 (0.79 mm) |
3/32 (2.38 mm) |
— |
— |
— |
|
> 20 and≤ 42 |
1/32 (0.79 mm) |
3/32(2.38 mm) |
b |
± 1% |
<0.500 in. (12,7 mm) |
|
>42 |
1/32 (0.79 mm) |
3/32 (2.38 mm) |
b |
± 1% |
£ Q625 in. (15.9 mm) |
Out-of-roundness tolerances apply to maximum and minimum diameters as measured with a bar gauge, caliper, or device measuring actual maximum and minimum diameters.
The average diameter (as measured with a diameter tape) of one end of pipe shall not differ by more than 3/32 in. (2.38 mm) from that of the other end.
| Size |
Type of Pipe |
Tolerance1 (Percent of Specified Wall Thickness} |
|
|
Grade B or Lower |
Grade X42 or Higher |
||
|
<2 7/8 |
All |
+20.- 12.5 |
+ 15.0.-12.5 |
|
>2 7/8and<20 |
All |
+ 15,0,-12.5 |
+ 15-I2.5 |
|
>20 |
Welded |
+ 17.5.-12.5 |
+ 19.5.-8.0 |
|
>20 |
Seamless |
+ 15.0.-12.5 |
+ 17.5.-10,0 |
Where negative tolerances smaller than those listed are specified by the purchaser, the positive tolerance shall be increased to the applicable total tolerance range in percent less the wall thickness negative tolerance.
|
Quantity |
Tolerance (percent) |
| Single lengths, special plain-end pipe or A25 pipeSingle lengths, other pipeCarloads.GradeA25,40,000lb(18 144kg)or moreCarloads, other than Grade A25,40.0001b (18 144 kg) or moreCarloads, all grades less than 40000 lb (18 144 kg)
Order items. Grade A25. 40.000 lb (18 144 kg) or more Order items, other than Grade A25,40,000 lb (18 144 kg) or more Order items, all grades, less than 40.000 lb (18 144 kg) |
+ 10.-5.0 + 10,- 35 -2.5 -1.75 -15 -3.5 -1.75
-3.5 |
Notes:
1. Weight tolerances apply to the calculated weights for threaded-and-coupled pipe and to the tabulated or calculated weights for plain-end pipe. Where negative wall thickness tolerances smaller than those listed in above table are specified by the purchaser, the plus weight tolerance for single lengths shall be increased to 22.5 percent less the wail thickness negative tolerance.
2. For carloads composed of pipe from more than one order item, the carload tolerances are to be applied on an individual order item basis.
3. The tolerance for order items apply to the overall quantity of pipe shipped for the order item.
Tensile testing of the pipe body—The tensile test should be carried out in accordance with ISO6892 or ASTM A370.Longitudinal samples should be used.Twice per test unit of pipe with the same cold-expansion ratio a.b.d.
CVN impact test—The Charpy test should be carried out in accordance with ASTM A370. Twice per test unit of not more than 100 lengths of pipe with the same cold-expansion ratio a.b.d.
Hardness Test—When suspected hard spots are detected by visual inspection, hardness tests shall be carried out in accordance with ISO 6506, ISO 6507, ISO 6508 or ASTM A 370 using portable hardness test equipment and methods complying with ASTM A 956, ASTM A 1038 or ASTM E 110 respectively depending on the method Used.
Hydro-static Test—Each tube shall be subjected to the hydro-static pressure test
Bending Test— a sufficient length of pipe shall stand being bent cold through 90° around a cylindrical mandrel.
100% X-ray test for the weld seam
The ultrasonic testing
The eddy current examination
A sufficient number of visual surface imperfections to provide seasonable assurance is necessarily. The defect shall be removed or cut off within the limits of requirements on length . The finished pipe shall be reasonably straight.
1. Manufacturer’s name or mark
2. Specification number(year-date or required)
3. Size( OD, W.T, length)
4. Grade( A or B)
5. Type of pipe( F, E, or S)
6. Test pressure( seamless steel pipe only)
7. Heat Number
8. Any additional information specified in the purchase order.
Bare pipe or Black / Varnish coating/Epoxy coating/3PE coating ( according to customer’s requirements);
6″ and below in bundles with two cotton slings;
Both ends with end protectors;
Plain end, bevel end(2″ and above with bevel ends, degree: 30~35°), threaded and coupling;
Marking.
API 5L X70 LSAW Steel Pipe
API 5L X65 LSAW Steel Pipe
LSAW Carbon Steel Pipe
LSAW STEEL PIPE WITH 3PE COATING
DN1400 LARGE DIAMETER LSAW STEEL PIPE


